Introduction
Our PiCloud Server is designed for maximum efficiency with minimal resource usage. While it runs beautifully on any system, we specifically optimized it for Raspberry Pi to take advantage of its low power consumption and small form factor. The entire application footprint is under 2MB (excluding Node.js runtime).
Why Raspberry Pi is Ideal
Low Power
Consumes just 3-5 watts, compared to 50-100W for traditional servers
Compact Size
Small footprint - fits anywhere with minimal space requirements
Scalable Storage
Supports USB drives, NAS, or network storage expansion
Customizable
Easily upgrade RAM or processing power with Pi models
Key Features
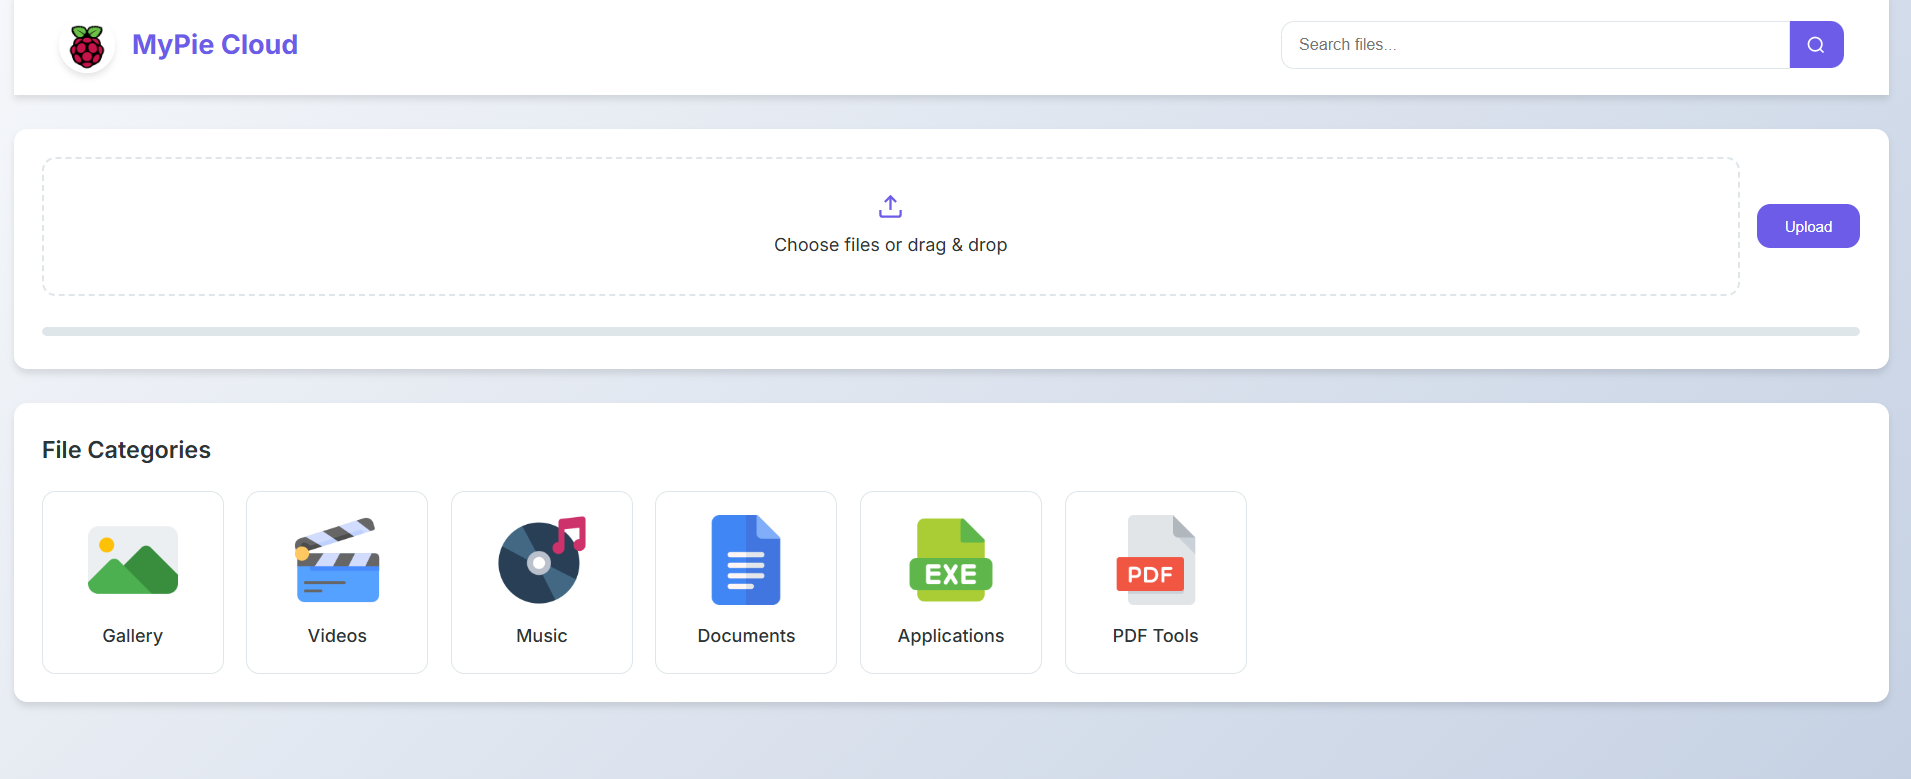
- Bulk File Handling: Upload up to 999 files at once
- Automatic Organization: Files sorted by type (images, documents, etc.)
- Smart Search: Find files quickly with metadata indexing
- Multi-select Operations: Download or delete multiple files at once
- Expandable Storage: Add USB drives or network storage easily
- Tiny Footprint: Core application under 2MB
Performance Metrics
| Metric | Raspberry Pi 5 | Windows PC | Linux Server |
|---|---|---|---|
| Power Consumption | 5W | 45W | 25W |
| Memory Usage | 150MB | 200MB | 180MB |
| Files Processed/sec | 15 | 25 | 30 |
| Idle CPU Usage | 2% | 1% | 1% |
Installation Guide
1. Install Node.js on Raspberry Pi
# Update system
sudo apt update && sudo apt upgrade -y

# Install Node.js
curl -fsSL https://deb.nodesource.com/setup_lts.x | sudo -E bash -
sudo apt-get install -y nodejs

# Verify installation
node -v
npm -v
2. Server Setup on Pi
- Download and extract:
wget https://nodeitstudio.com/download/picloud.rar unzip picloud.rar cd picloud - Install dependencies:
npm install --production - Start the server:
node server.js
3. Auto-start on Boot (recommended)
Create a systemd service:
sudo nano /etc/systemd/system/picloud.serviceAdd this content:
[Unit]
Description=PiCloud Server
After=network.target

[Service]
ExecStart=/usr/bin/node /home/pi/picloud/server.js
WorkingDirectory=/home/pi/picloud
User=pi
Restart=always
Environment=NODE_ENV=production

[Install]
WantedBy=multi-user.target
Enable the service:
sudo systemctl daemon-reload
sudo systemctl enable picloud
sudo systemctl start picloud
1. Install Node.js on Windows
- Download Node.js LTS from nodejs.org
- Run the installer with default options
- Verify in Command Prompt:
node -v
npm -v
2. Server Setup
- Download and extract the zip file
- Create two batch files:
install.bat
@echo off
echo Installing dependencies...
npm install --production
pause
start.bat
@echo off echo Starting PiCloud... node server.js pause - Run install.bat first, then start.bat
- Access at http://localhost:5050
1. Install Node.js on Linux
# For Debian/Ubuntu
curl -fsSL https://deb.nodesource.com/setup_lts.x | sudo -E bash -
sudo apt-get install -y nodejs

# For RHEL/CentOS
curl -fsSL https://rpm.nodesource.com/setup_lts.x | sudo bash -
sudo yum install -y nodejs
2. Server Setup
- Download and extract:
wget https://nodeitstudio.com/download/picloud.rar unzip picloud.rar cd picloud - Install dependencies:
npm install --production - Start the server:
node server.js - For production:
NODE_ENV=production nohup node server.js &
Configuration Options
Customize in routes/upload.js:
module.exports = {
    port: 5050,                     // Server port
    maxFiles: 999,                  // Max files per upload
    maxStorage: '10GB',            // Storage limit (10GB, 1TB, etc.)
    uploadDir: './cloud-storage',   // Storage directory
    autoOrganize: true,            // Automatic file categorization
    fileTypes: {                   // Organization categories
        images: ['jpg','png','gif','webp'],
        documents: ['pdf','docx','txt','md'],
        media: ['mp4','mp3','avi','mov'],
        archives: ['zip','rar','7z','tar'],
        others: ['*']               // All other types
    },
    enableSearch: true,            // File search functionality
    thumbnailGeneration: true      // Generate thumbnails for images
};
Storage Expansion Guide
For Raspberry Pi users, you can easily expand storage:
- USB Drive: Plug in any USB storage and mount it to your upload directory
- NAS Storage: Mount network storage and point to it in config.js
- Cloud Backup: Set up cron jobs to sync with S3 or other cloud services
Ready to Build Your Efficient Cloud?
Download the PiCloud Server and have it running in minutes.
Download Now (1.9 MB)